
Discover the secrets of my latest 3D Hot Dog Cart model, optimized for both Unity and Unreal game engines. This model was created with a low polygon count in mind and I also added LODs for even better optimization. With 7 unique texture sets, each with its own UV space, the textures are amazing and the resolution is top-notch.
The components are separated for easy rigging and animation. The tools I used were: Blender for modeling and unwrapping, with the help of HardOps, BoxCutter, and MeshMachine 3D addons. Marmoset Toolbag was used for baking, and Substance 3D Painter for texturing.

I’m always on the lookout for inspiration when it comes to creating game props. I take screenshots while exploring open world games and save them in a folder for later. Another great source of inspiration is checking out the talented artists on Artstation. For my hot dog cart concept, I was inspired by a similar cart in GTAV. As a street food fan, I couldn’t resist the temptation to bring my own version to life.
To gather references, I did some research by searching for images and 360-degree views of hot dog carts using Sketchfab. I also watched videos on YouTube to gather more information about the various components and features of hot dog carts. I wanted my design to be as realistic as possible, so all of this information was invaluable.
I kept all of my references organized using PureRef, a fantastic tool for collecting references. I had it open in a small window on the bottom right of my screen for easy access. Here are some of the images I used as reference.

The blocking out phase is a crucial step in the 3D modeling process. This involves creating simple shapes to assess the proportions and silhouette of the model. If you have good references, such as front, side, and top images, you can start modeling directly in the 3D viewport. But if you don’t have any references, the blocking out phase becomes even more important.
In my case, I had a silhouette available for my hot dog cart model, so I was able to start modeling right away. Personally, I like to start with some details, such as bevels and subdivisions, to get a sense of satisfaction and see if I’m on the right track. That’s why I started with a highpoly model.
When it comes to modeling new game props, I always think about how I can utilize my hard surface modeling skills and techniques. My goal is to have a clean and organized topology, despite using booleans, the subdivision surfaces modifier, and bevels and chamfers. I also enjoy using the remesh workflow for creating high poly models. I carefully consider my approach for each component I model.
One common challenge in hard surface modeling is cleaning up the topology after boolean operations. Fortunately, addons such as HarOps, BoxCutter, and MeshTool can greatly help speed up the process. I like to model based on references, tracing the profile and building the mesh, manipulating vertices and using my favorite modifiers. This technique helps to achieve a result that is faithful to the original and therefore more realistic.
Another challenge is maintaining accurate scale, proportions, and thicknesses in 3D objects. To overcome this, I always compare my models to a reference character that is approximately 180cm tall or look for exact measurements of the real object when available.


When it comes to unwrapping and creating UV maps, I used Blender. I created 7 texture sets for 7 materials to maximize texture resolution. During the unwrapping phase, I used the ZenUV and UVPackmaster add-ons that provide fantastic functions to properly unwrap the mesh. UV unwrapping can be a time-consuming process, but fortunately, there are some great addons that can help you speed it up and improve the quality of your UV maps. One such addon is UVZen, which offers a range of helpful functions, including a tool for calculating Texel Density. This allows you to distribute texture resolution evenly across all mesh components, ensuring that your textures look great on every part of your model. Additionally, UVZen makes it easy to straighten UV shells and together with UV Packmaster offers many other useful functions that can help you get the most out of your UV maps. By using these addons, you can streamline your workflow and create better unwrapping and 3D models in less time.
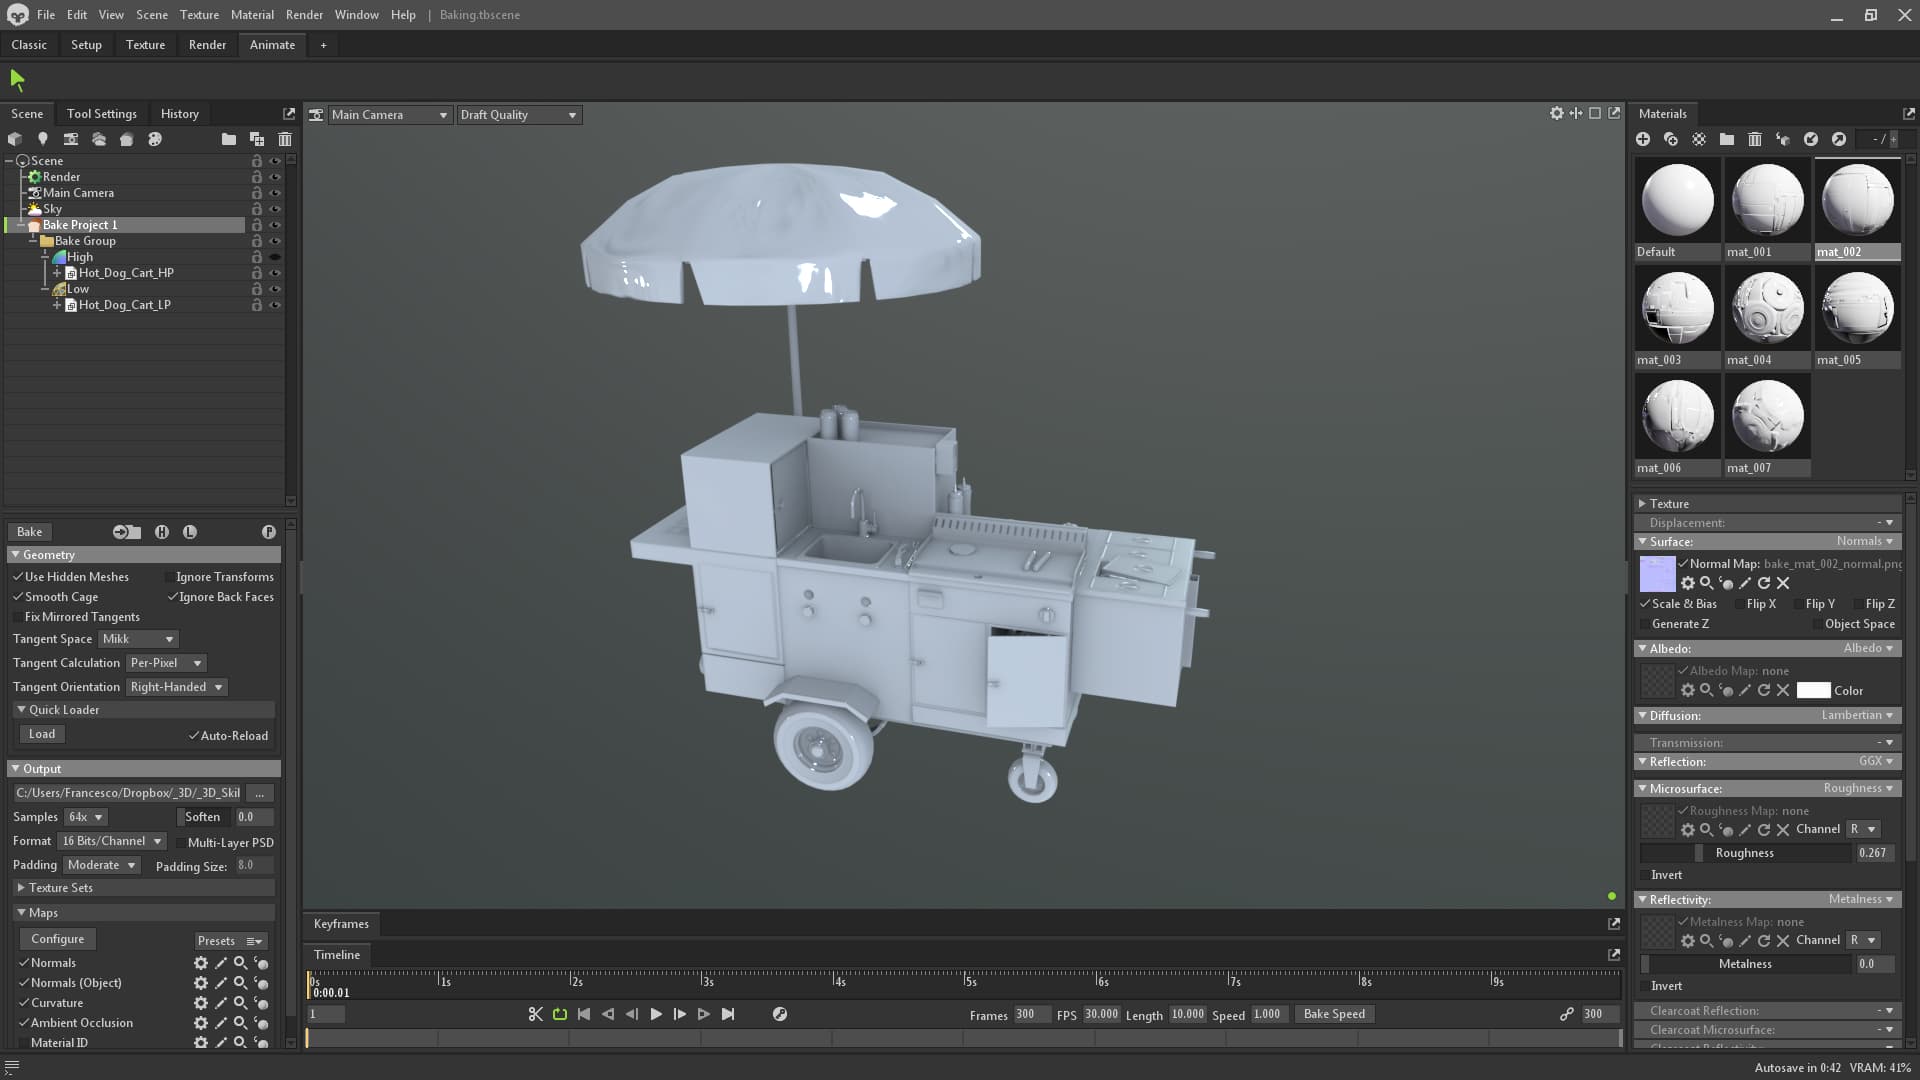
After finishing the Unwrapping and material assignment phase, I exported the highpoly and lowpoly fbx files and then used Marmoset Toolbag for baking. I cannot stress enough how fantastic this software is, it has an intuitive interface and allowed me to make photorealistic renderings, texturing, animations, and much more!
Marmoset Toolbag’s sophisticated baking system made the process even easier and more precise by allowing me to correct artifacts in real-time and make operations on the cage such as adjusting the offset or the skew map. Working with advanced and high-quality tools is always a pleasure! Additionally, starting from version 8.3 of Substance 3D Painter, the baking system has been reviewed and significantly improved.


Texture creation is all about organization and attention to detail. I’ve learned a lot from observing talented artists on Artstation and their tutorials, which I’ll share at the end of this article with links to their profiles. I focus on one piece at a time during texturing, but I also know that starting with a basic material for all components of the object and gradually adding more detail can be an interesting approach. This is a similar logic to what’s often used in modeling and sculpting.
To keep my layers organized in Substance Painter, I divide them into folders and give them logical names. I begin with a base material and then add variations in roughness and color as needed. I also use generators or smart masks to add effects such as dirt, scratches, etc. I love combining these generators with the curvature map or ambient occlusion to create interesting effects on the edges of objects or in cavities.
Texturing is a process that requires attention to detail and organization. It’s important to have a good collection of references for the different materials, to look at every detail, and to try to recreate what works best for our project. During the texturing phase of the hot dog cart, I discovered a very interesting filter in Substance 3D Painter to recreate the water droplets on the hot dog cart sink. It’s called MatFX Water Drops and it really helped me add that extra touch to my model.
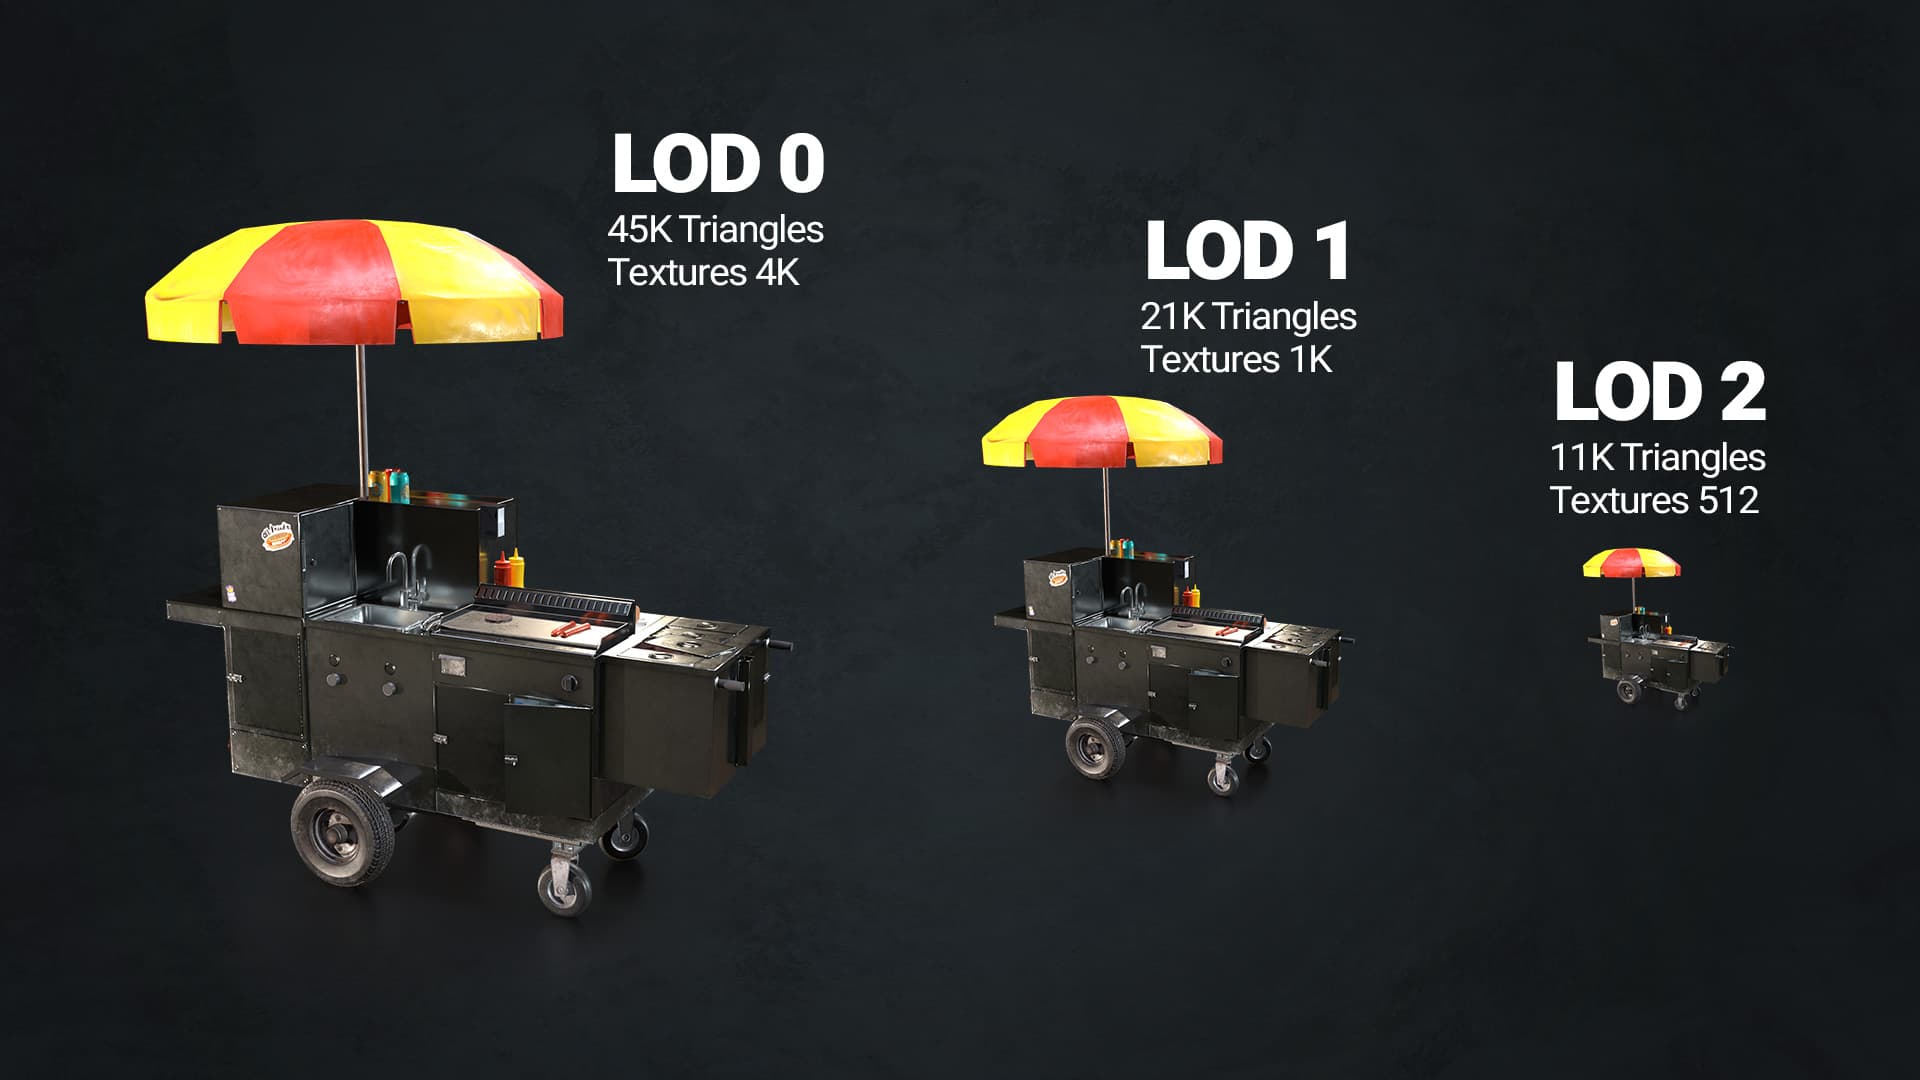
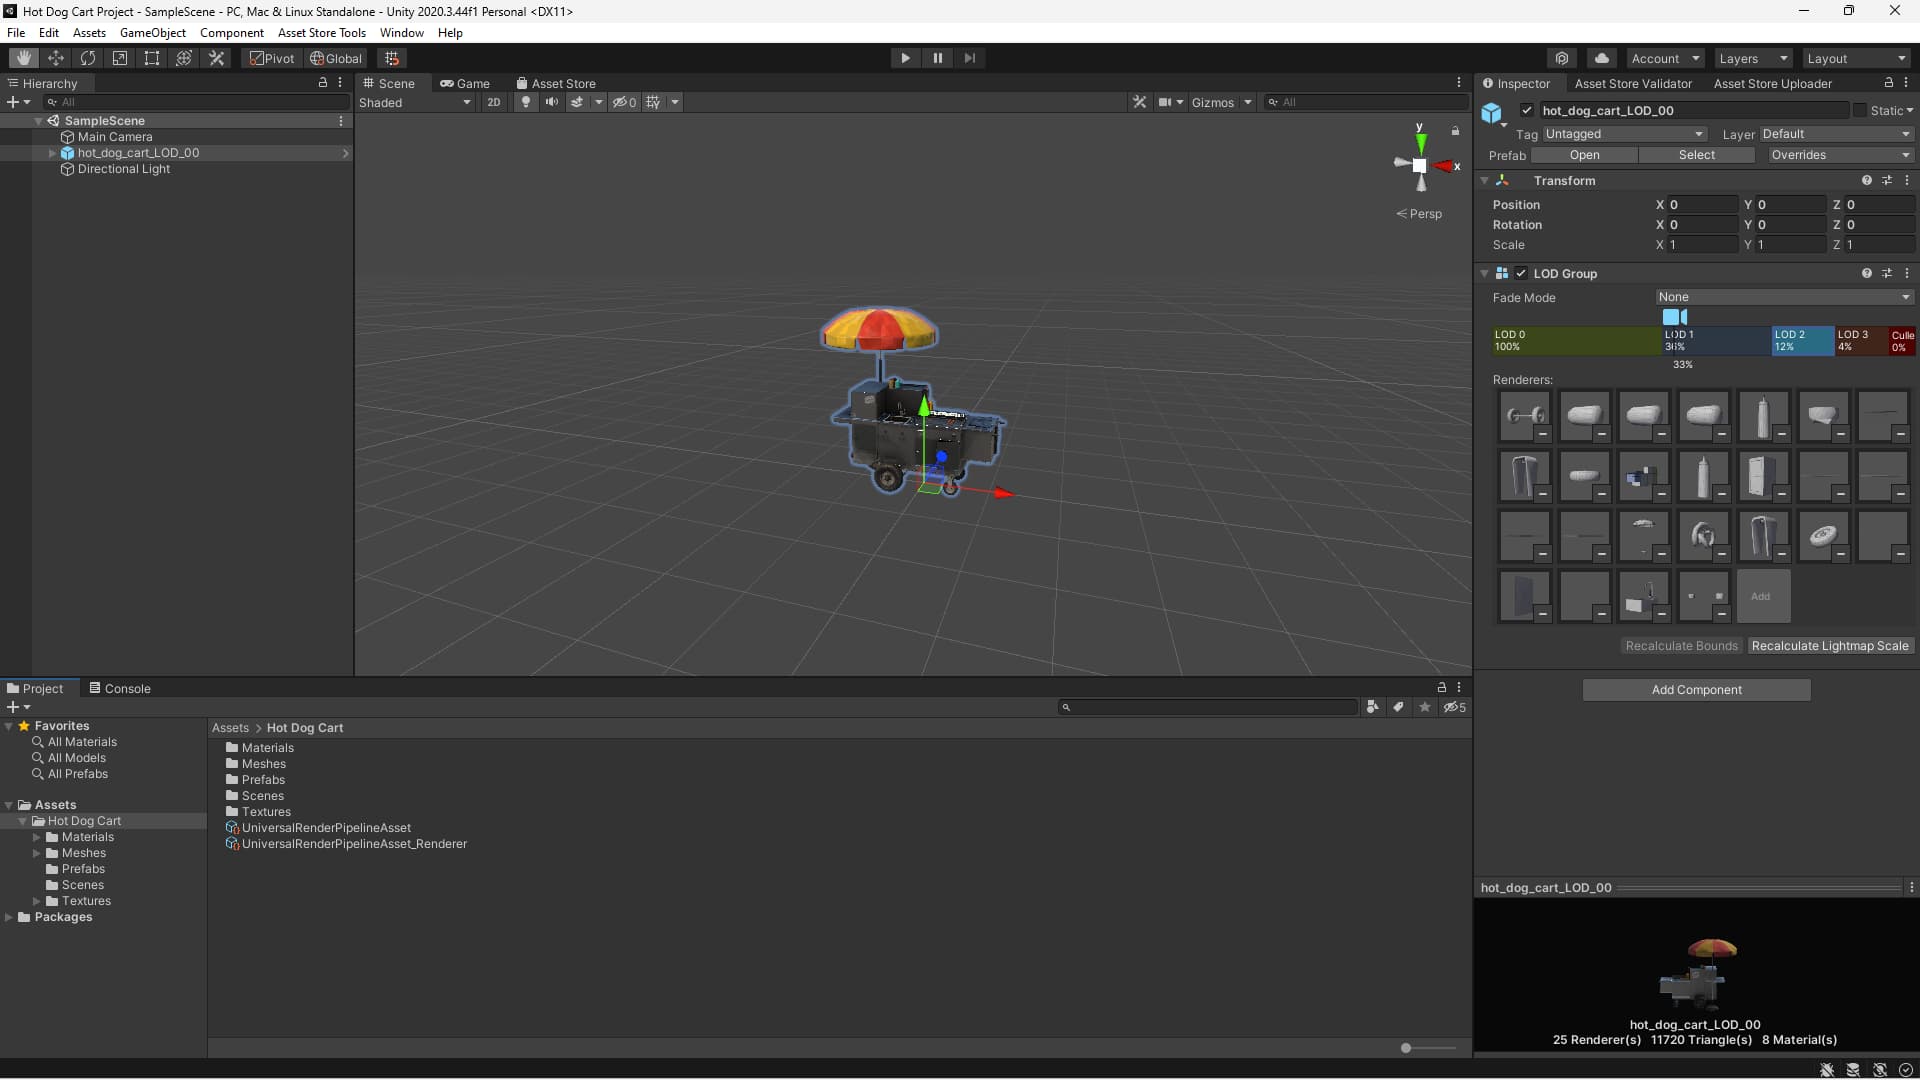
After completing the texturing, I exported the PBR maps for Unity and Unreal using the Substance 3D Painter configuration. Then, I created the Levels of Detail (LOD) using Blender and exported them as fbx files. LODs are versions of the original model with a reduced number of polyggon, which are loaded based on the distance from the camera. I used the Blender decimate modifier to create the LODs.
For the subsequent LODs, in addition to decimation, I also eliminated components that wouldn’t be visible from far away. Finally, I loaded textures at different resolutions for each LOD, for example, LOD0 in 4K, LOD1 in 2K, LOD2 in 1K, etc.
Optimizing your 3D model is like giving your game a power-up! It helps ensure a smooth and speedy gaming experience, especially on devices with limited processing power like mobile phones or lower-end PCs.Creating Levels of Detail (LODs) is a super smart move when it comes to optimizing your 3D models. Think of it like having different versions of your model, each with fewer polyggon details. This means the GPU can process them more easily and efficiently. And, when the camera moves away from the model, the LOD with fewer details will be loaded, saving resources and helping your game run even smoother.
Textures are another important piece of the optimization puzzle. By loading lower resolution textures for LODs, you can lighten the load on the GPU and improve performance.By doing all of this, you’ll be giving your hardware a break and reducing the number of drawcalls required. The result? A more fluid and enjoyable gaming experience for you and your players.
Once the optimization was complete, I published the model on major 3D model marketplaces such as the Unity Asset Store, CGTrader, BlenderMarket, Artstation Marketplaces FlippedNormals, so game developers and 3d artists can purchase and use it in their projects. Additionally, I published a timelapse video on my YouTube channel showing the creation of the 3D model and its texturing.
I am very grateful to the supportive community that provided valuable feedback during the development process. I want to invite everyone to try the 3D Hot Dog Cart model in their game projects and provide me with their feedback, so I can continue to improve and perfect my 3D models. Thank you for reading this article, and I hope to have inspired you to create increasingly beautiful and functional 3D models.
Are you looking for the perfect 3D hot dog cart model optimized for both Unity and Unreal game engines? Look no further than my latest creation!
🔥 Paula Sánchez-Ferrero for her awesome course on Domestika
🔥 Blender Italia, the community where my journey into the world of Blender and 3d computer graphics started
🙂 And many other people who every day teach me something new
🔥 Old Chair Full Creation Process (by Andrew Averkin) – (affiliate link)
🔥 Learn HardOps and BoxCutter (by BlenderBros) (affiliate link)
Step up your 3D game with our exclusive collection of high-quality game props, HDRi environments, and PBR materials. With our carefully curated assets, you can bring your scenes to life with stunning realism, adding depth and authenticity to your work.

Unleash creativity with our VR/AR-optimized game props, detailed with PBR textures. Perfect for indie developers and virtual environment creation.
Elevate your 3D scenes with our HDRi collection. Explore our vast library for the perfect HDRi setting, and create more captivating 3D worlds.
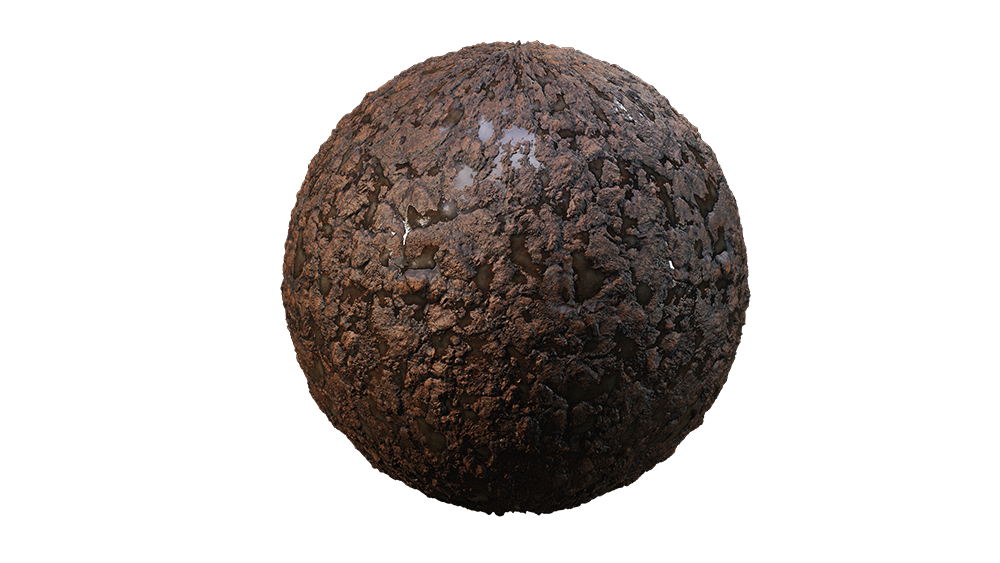
Perfect your game design with our quality PBR materials. Our collection ranges from real-world textures to sci-fi elements, all user-friendly and easy to master.